Tying Your Own Top-Water Assist Hooks

Tying your own assist hooks can be a great way to experiment with, and fine-tune, the swimming action of your top-water stick-baits. Whilst there is a wide range of pre-tied assists available on the market to make things easier, it can often be difficult to find a suitable option for each lure in your kit, especially when you need to match the pre-tied options with the size, weight, and weight distribution of each lure.
Aside from allowing you to fine-tune your stick-bait, using assist hooks can provide a couple of benefits that make them worthwhile to experiment with. The main one of these is that the hook is now free to move and twist in all dimensions, reducing the possibility of the hook locking up with the split ring and lure and working itself free. The other is that the hooks are moved further away from the body of the lure, meaning the fish doesn’t have to attack the lure directly, just getting close enough to check it out may result in a hook setting that otherwise might’ve been missed.
In short; tying your own assists is an easy way to really fine-tune your lures, and allow the hooks to move freely - which in turn can improve hook-up rates and catch rates.
BKK offer several hooks that are suitable for this use, but today we’ll be focusing on the BKK 8090-DEEP, tied with our 420lb hollow-core assist braid. This combination will lock down even the beefiest surface kingfish with ease, but you can adjust the hook size, hook design, and weight ratings to suit smaller lures and target species.

STEP 1. Gather Materials
- BKK 8090-DEEP jig hook of appropriate size
- BKK Assist Cord (choose the weight required. We usually use 420lb)
- BKK Solid Rings
- Scissors / sharp knife / cutting tool
Optional: Heat shrink

Step 2. Find the Right Length.
Loop and pinch the assist cord, then feed it through the back of the hook eye.
Leaving about 20mm of tag end, adjust the amount of cord coming through the eye until it looks to be roughly the length you require.
Now add roughly 10mm extra - this will be used up to form the knot, leaving you with the right length.

Step 3. Cut Desired Length.
Once you’ve cut the excess cord, you’re now ready to tie the assist. Arrange your cord as shown above. Be sure that you are feeding the cord through the back of the hook eye (toward the hook point). This is important to ensure the hook loads correctly when setting the hook in a fish.
Step 4. Align the Spine.
Align the cut ends of the cords with the spine of the hook as shown above. Plenty of excess cord makes this much easier when learning, but once you’ve got the hang of it you can reduce the length of the ends to save material.
Bring the looped end of the assist cord BEHIND the hook as shown above.
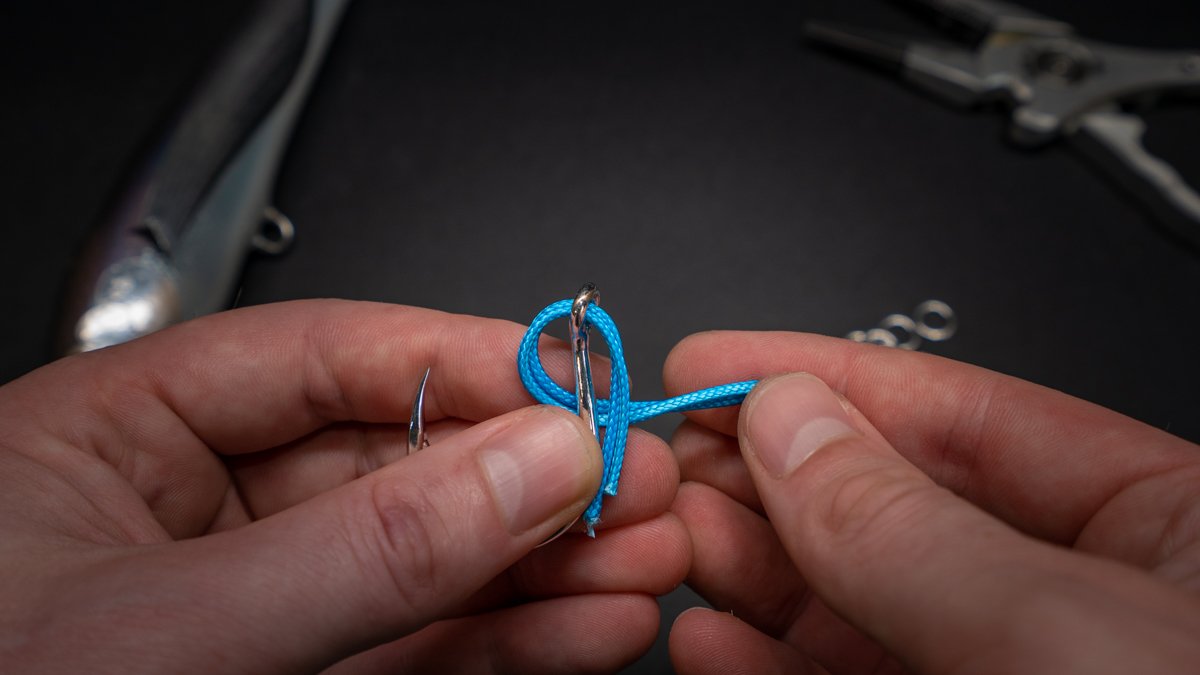
Step 5. Forming The Knot
Bring that looped end from the previous step around the front of the hook, and poke it through the newly formed loop. Ensure you have captured the two cut ends against the spine. This is what locks the knot together when under load.

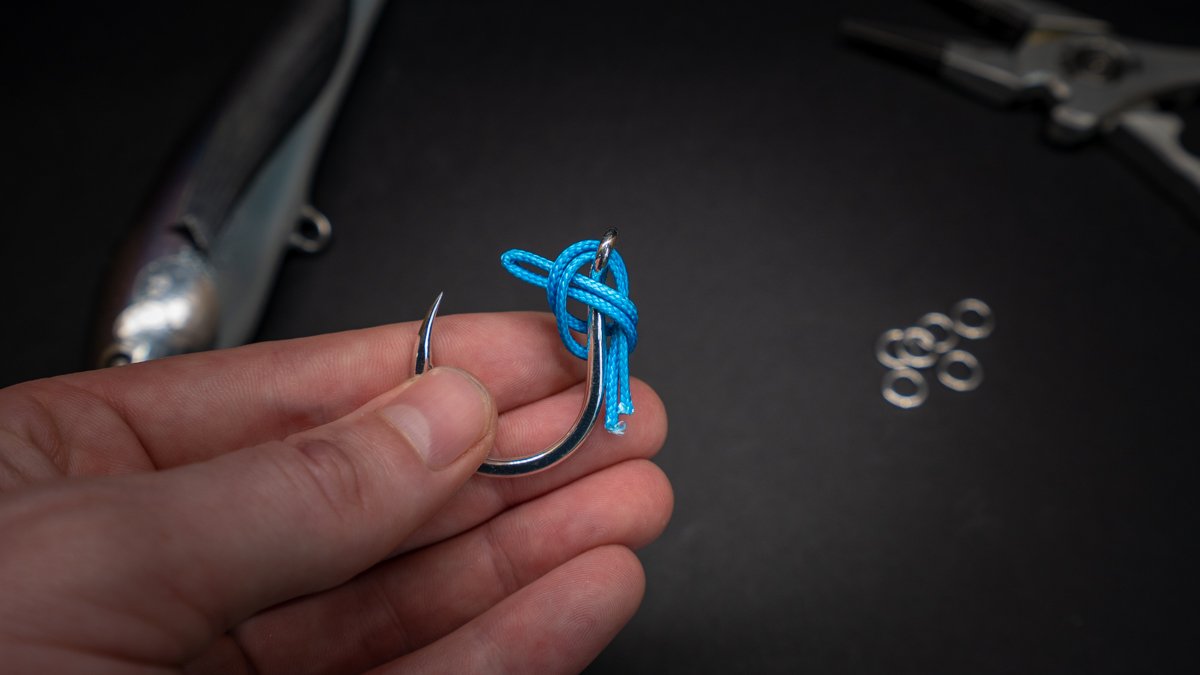
Step 6. Dress the Knot
This is your chance to dress the knot and make sure everything is tidy and in the right place. The more time you spend here, the more reliable to knot will be.
After tightening and aligning everything, you should end up with something that looks like the above.
With the hook facing away from you, align the looped end of the assist cord to your right - this will help with the next step.

Step 7. Pinch & Poke
Holding the hook with the point to the right, pinch the looped end and poke it through the hook eye from the rear of the hook eye. This can be tricky if the eye is small or the cord isn’t locked down tightly in the previous steps.

Step 8. Pull Tight.
This final step locks everything together. The harder you pull, the more the knot will clamp down on the hook shank and the cut ends, locking everything down even more. What results is an extremely strong knot that will not fail if tied correctly.
You can now cut the excess off the other end. Be careful not to cut too much off - if the knot slips at all you need some cord there to avoid it slipping through and risk coming undone. About 5mm should be fine.
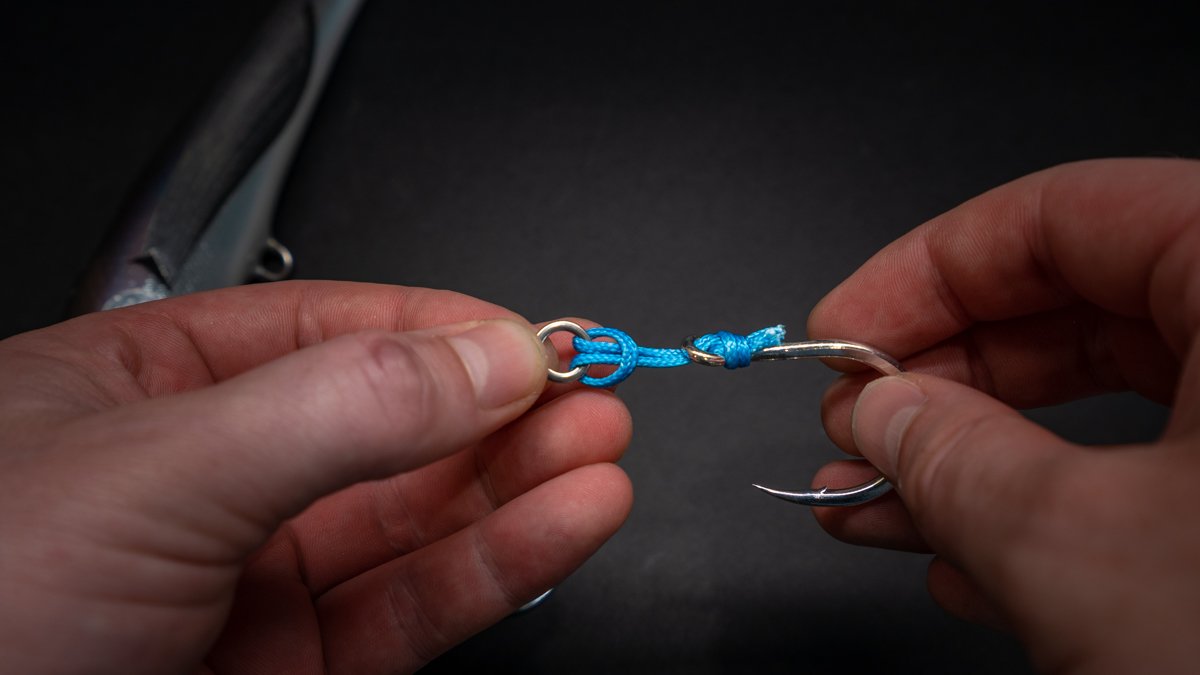
Step 9. Attach the Split Ring.
Using a standard girth-hitch, attach the solid-ring to the end of the cord.
This is now ready to attach to your stick-bait using a split-ring connector. If you wish, you can now place a section of heat-shrink over the knot to protect it from further abrasion.
You can experiment with the lengths of the assist cord to match your own lures and see how it affects the swimming action and hook-up rates. In the image below you can see we have tied a much shorter assist than the one shown above. After a few tries, you will start to get a pretty good feel for how long your starting cord needs to be to reach the right end length.

Not quite ready to tie your own? Check out our pre-tied assist hook options below.