Trolling for Yellowfin Tuna: How to Rig For Reliable Hook Sets
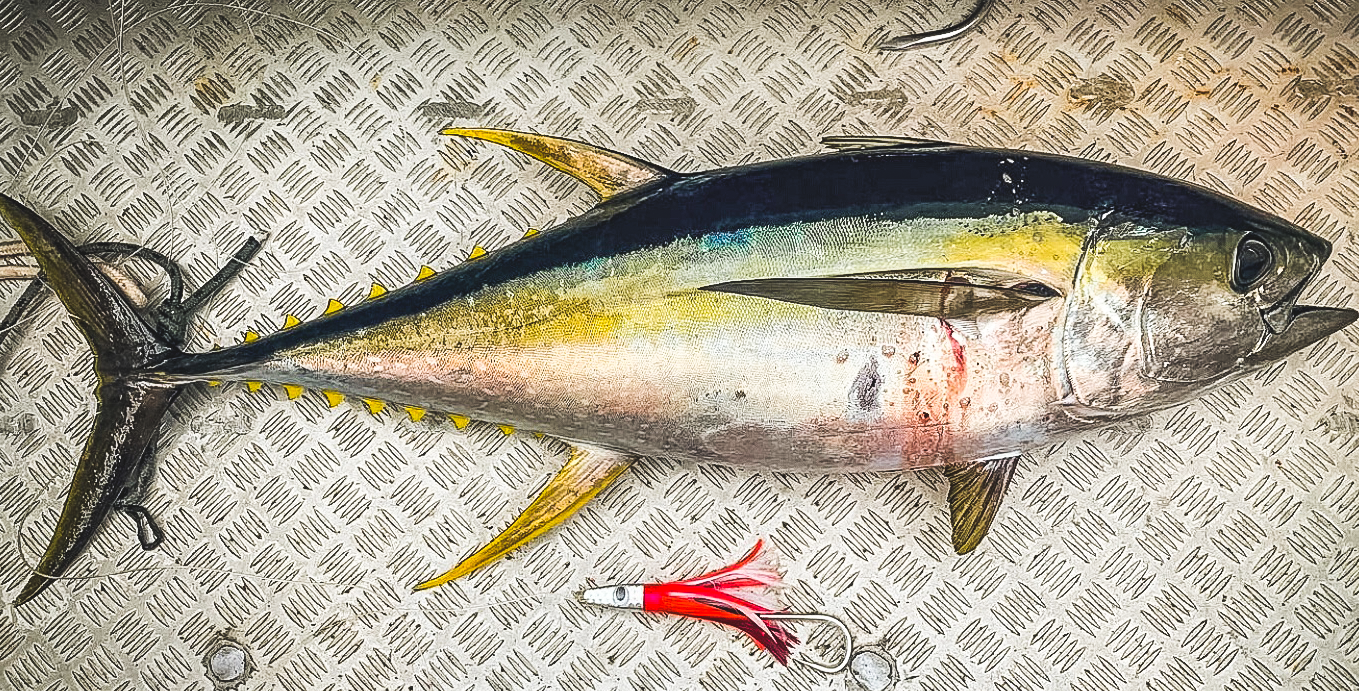
When targeting Yellowfin Tuna, trolling is a highly effective and exciting method to use. In general, the Yellowfin we find in New Zealand waters don’t get as large as Bluefin Tuna, but don’t let that put you off… these fish will still hit hard and put both the angler and gear to the ultimate test.
At the right time of year Yellowfin will hang around mainly offshore from the East Cape and Bay of Plenty, but you’ll find them in other areas too. The best time to start hunting is when the water starts to warm up a bit - usually around December. If there’s a good amount of food around and the water temp is around 20°c, it’s likely the Yellowfin will be around.
The time, money, and effort required for this style of fishing is considerable, so we recommend making sure you’ve got your rigging 100% dialled and ready to lock down any fish that come your way. The stakes are high, so this is not the area you want to risk skimping on tackle.
In this article we will be diving into what we do to make sure our rigging is spot on, and what will give us the best chances of a successful Yellowfin Tuna mission.
How to Rig Yellowfin Tuna Trolling Hooks
STEP 1. Selecting the right hook
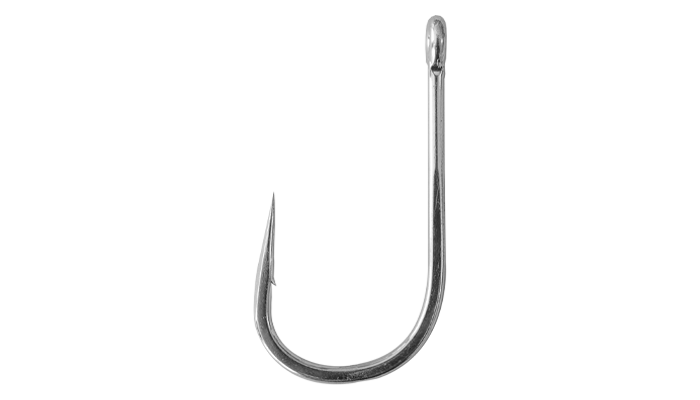
Trolling lure hooks come in a variety of designs, sizes, and materials. But for they all share a similar design.

Trolling hooks are typically designed with a long, straight shank and an eyelet positioned at a 90-degree angle to the hook point orientation. These hooks are commonly crafted from heavy-gauge wire, although lighter-gauge options are available for those with a preference for them.
When it comes to selecting a trolling hook, personal preference plays a significant role, but focusing on crucial aspects such as sharpness, durability, and strength is essential. Additionally, choosing the right size hook for your lure is a crucial consideration. Your nearest BKK retailer can provide expert guidance on selecting the appropriate hook size based on the specific trolling lures you intend to use.
For this tutorial, we will be using the BKK Kajiki HD trolling hooks. The Kajiki HD was designed from the ground up to address the performance required for heavy game fishing, including Marlin & Tuna, and are your best choice for raw strength and superior sharpness.

STEP 2. Materials Needed
There's something satisfying about rigging your own tackle. The thrill of landing gamefish on a rig assembled from scratch introduces a unique and rewarding angle to the whole thing. If you’re new to this, you’ll probably be somewhat nervous about your rig failing under the load from a fish (we all were on our first time), but if you follow these instructions your rig should hold strong and you’ll be golden 👍🏻
Here’s what you will need:
1. Crimping Tool
2. Stainless wire (or mono if you prefer)
2. Copper Crimps
3. Chafe Tube
4. Heat Shrink
5. BKK Kajiki Trolling hooks

Your local tackle store should have these items available. Be sure to select the right size chafe tube stainless-steel wire, copper crimp, and heat shrink to match your chosen hook size.
(If you want to remain compliant with IGFA regulations, talk to your local tackle store or check out pages 4-7 of the IGFA Rules)
STEP 3. Prepare.
Arrange your pieces as shown below. This is where you will need to pay attention to IGFA rules around line lengths and hook arrangements.
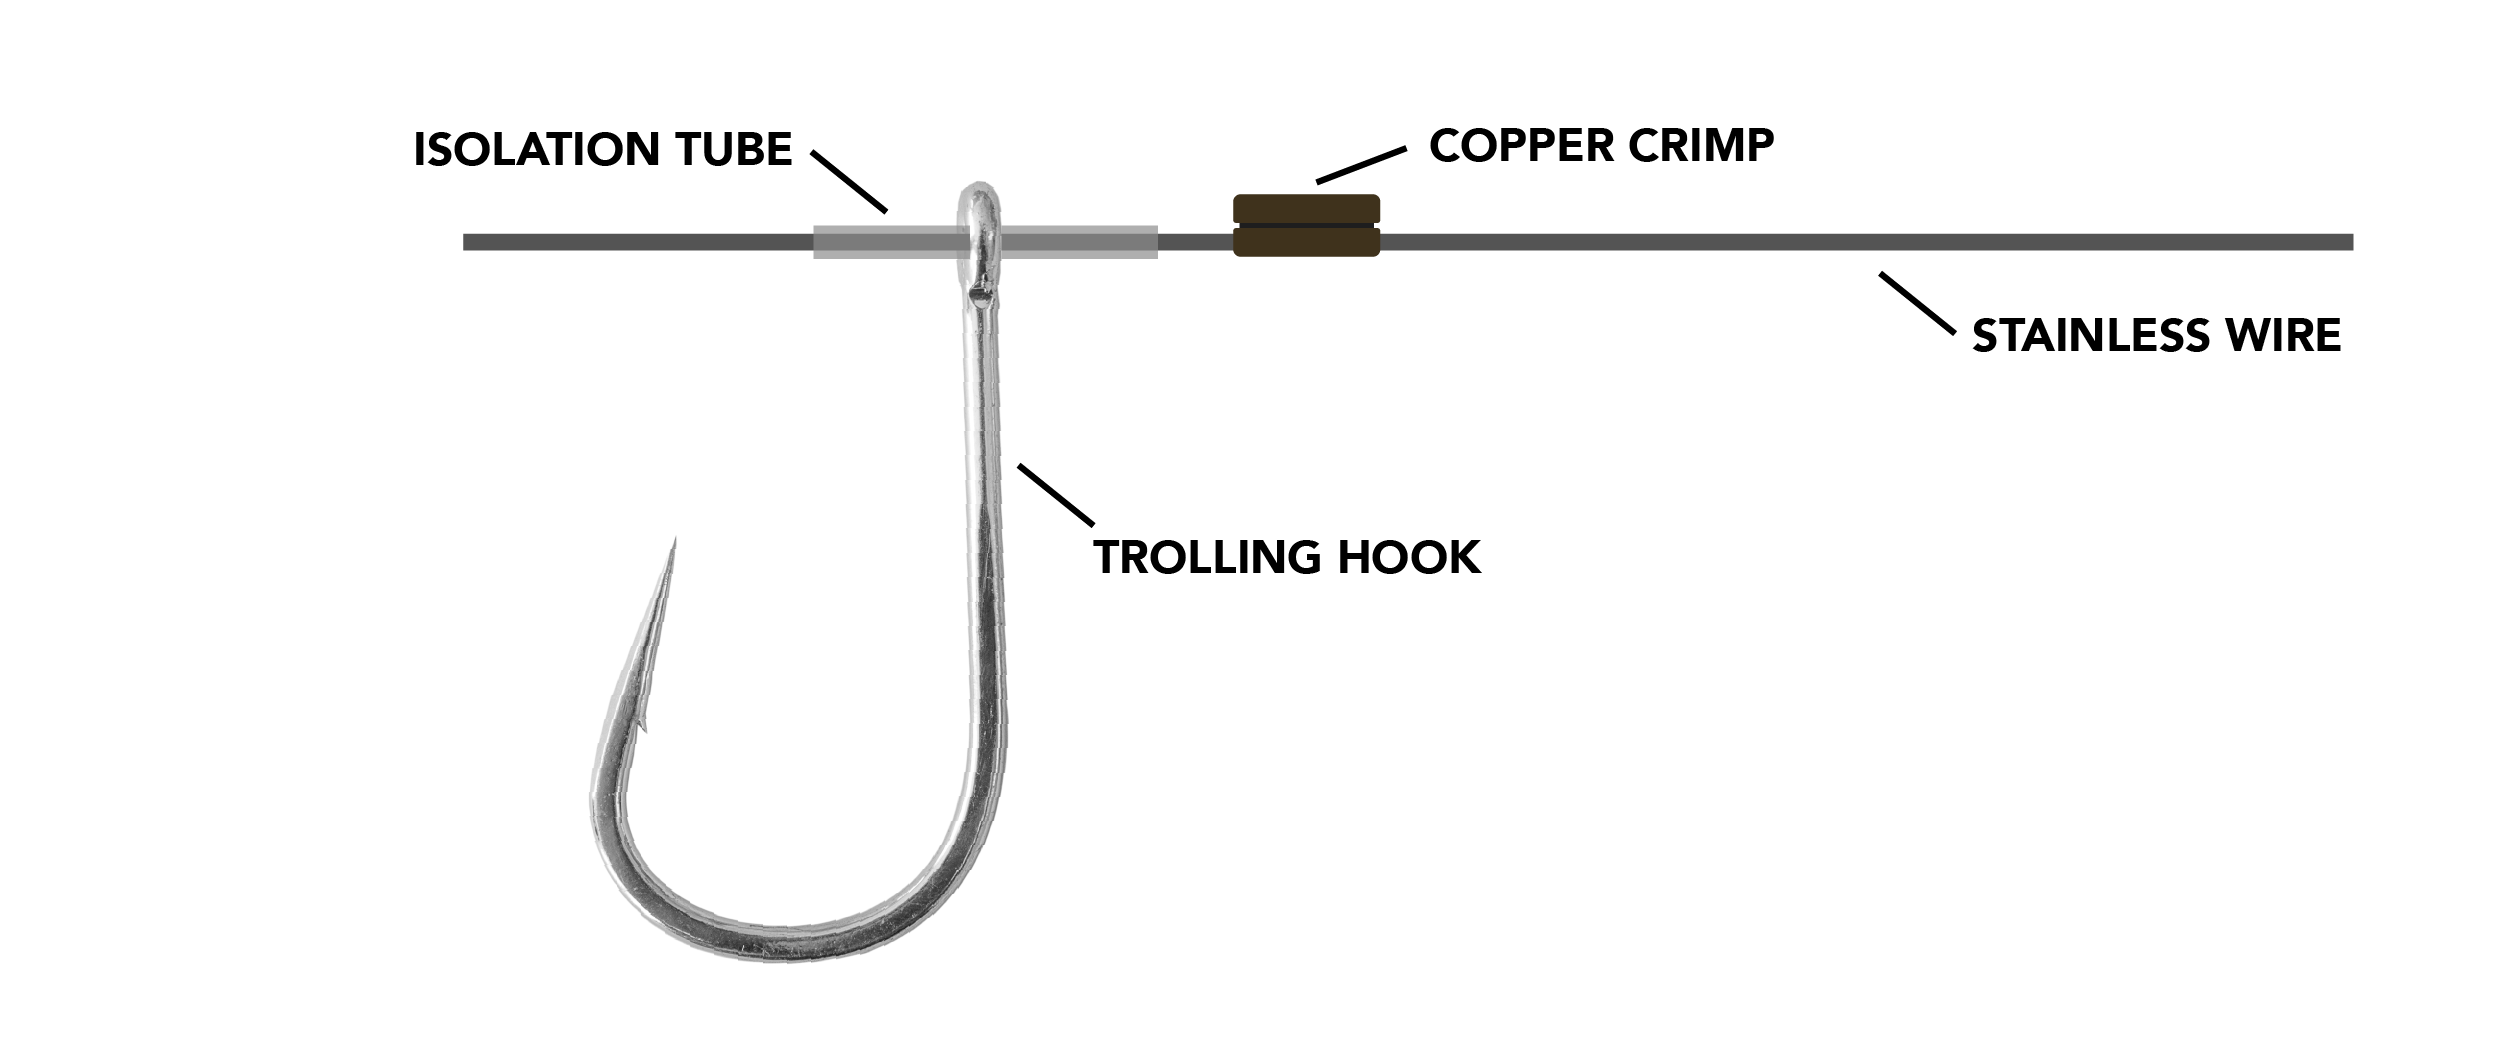
• Trim the chafe tube to a length that allows a tidy 'U' shape when looped through the hook eye
• The hook eye should not be able to contact the steel wire directly. This is to avoid any reaction between the high-carbon steel of the Kajiki HD and the stainless wire.
• Check that nothing is too tight or too loose. The hook should still have free movement.
Note: If you’re rigging multiple lures, do a test first to make sure everything ends up correct, then come back and make any adjustments, then cut the rest of the lengths.
Step 4. Dry fit AND crimp.
Once you've ensured that everything is in its proper place, it's time to secure everything in position.
Take a moment to verify the crimp setting on your crimping tool. Ensuring a secure crimp is crucial; the last thing you'd want is a crimp failure mid-fight due to insufficient crimping!
Don't forget the top loop. Place another copper crimp onto the top of your wire and create a small loop by threading the loose end back through. Aim for a top loop that aligns at a 90-degree angle to the bottom loop. Achieving the right configuration might take a couple of attempts, but perfecting it ensures that your hooks maintain the optimal orientation while trolling.

Step 5. Heatshrink to lock it all down.
The last step is to apply the heat-shrink. This stops the possibility of the hook swinging back on itself and getting stuck.

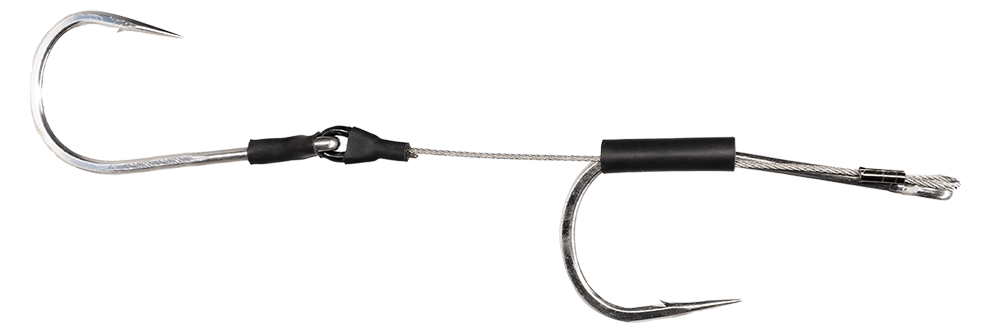
Extra: Double-hook Rigging
Adding an extra hook at this stage is easy. Just slip another short length of heat-shrink over your end loop, and insert your secondary hook through this to hold it in the correct orientation. The connection to your mainline will now pass through the eye of your hook AND the top loop of your wire rig.
There are many other ways to rig trolling lure hooks, however this is how we prefer to rig ours and generally how we recommend the Kajiki range of trolling hooks to be rigged.
If you’re unsure about hook sizes or the materials required, your local tackle store will be able to point you in the right direction.
You can also get in touch with us via our social media channels and a member of the team can help you out.
Happy trolling! 🎣


Designed to handle large gamefish such as Marlin and Tuna, the KAJIKI HD range is a reliable and durable option for serious anglers who demand the ultimate in performance and reliability.
Features:
Bright Tin (BT) coating
Solid welded eye
Hand-Ground point
High-carbon steel wire

The Kajiki Light Gauge trolling hook is designed for trolling on line up to 8kg. With the hand-ground point, these hooks offer superior penetration, and the Ultra-Antirust coating means that your hooks will stand up to corrosion for longer. The slightly turned in point on the Kajiki balances a quick & clean hook-up with maximum holding power - increasing your hook-up rate.
PLEASE NOTE: When rigged with wire, we recommend using isolation tube between the hook and the wire to remove any chance of corrosion forming due to contact between the dissimilar metals.
Features:
Light Gauge construction
Ultra-Antirust coating (UA)
Hand-Ground hook point
Solid welded eye
Sizes:
8/0, 10/0, 12/0
Coating:
Ultra-Antirust
Made to pin large game fish like Marlin & Tuna, the open gap design of the Kajiki HD Open Gap ensures a solid hook set on larger fish. The Kajiki HD Open Gap was designed around our popular Kajiki range of trolling hooks, meaning they can be trusted to hold down that dream fish when it comes along.